如何配置 SQL Server 无域 AlwaysOn 可用性组
环境准备
创建可用性集:
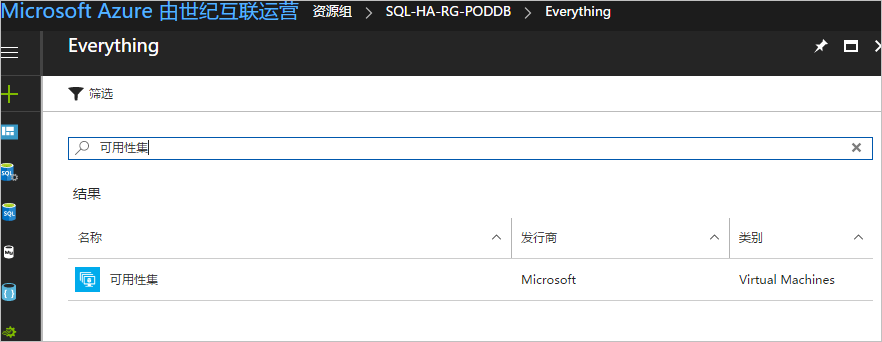
- 域控制器可用性集 adavailabilitySetPoddb
- SQL Server 可用性集 sqlAvailabilitySetPoddb
创建 3 台服务器,并配置为同一个 VNet:
DNS 服务器:dns
服务器 1:node1
服务器 2:node2
注意
- 在三个服务器上关闭防火墙。
- node1 和 node2 在同一个可用性集中。
操作步骤
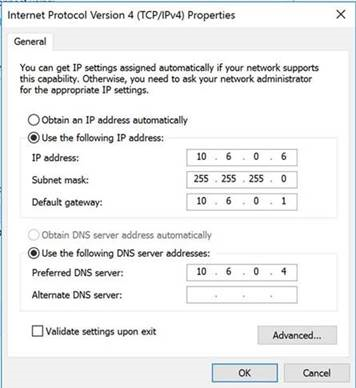
设置静态 IP、默认网关以及 DNS 服务器:
在 Azure 门户上,配置 3 台服务器使用静态 IP。

在 node1 和 node2 中设置静态 IP、默认网关、DNS 服务器 IP:
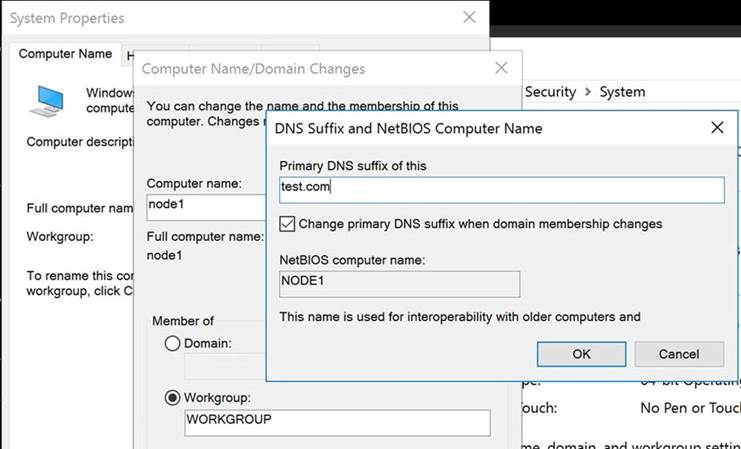
在 node1 和 node2 中手动修改 DNS Suffix:
把 hostname 和对应的 IP 地址写到 C:\Windows\System32\drivers\etc\hosts 文件中。
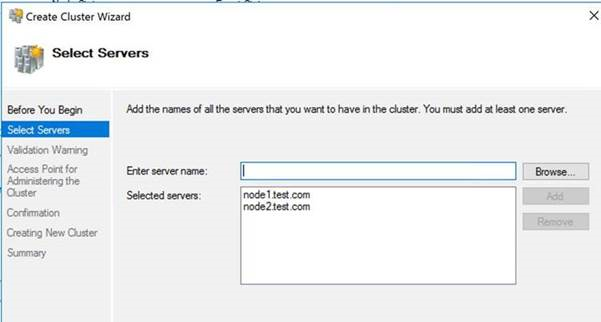
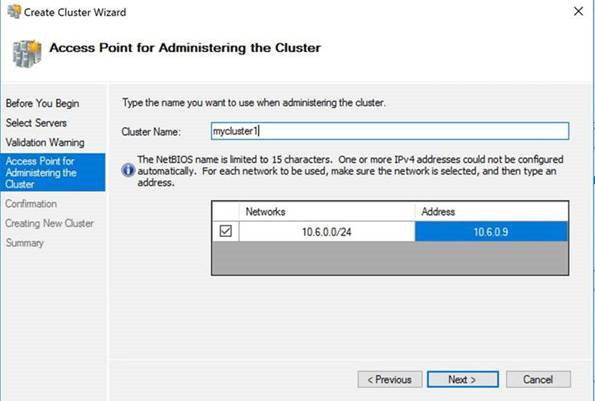
安装 Cluster:
在 node1 和 node2 上安装 Failover 服务并创建 Cluster:
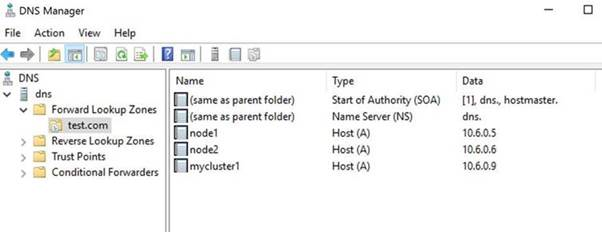
在 DNS 中创建对应的 AName:
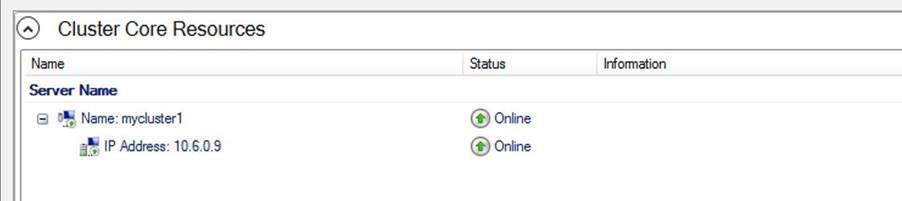
成功创建 Cluster。
配置 SQL Server 服务:
在 node1 和 node2 上安装 SQL Server 服务,启动账号设为本地管理员。
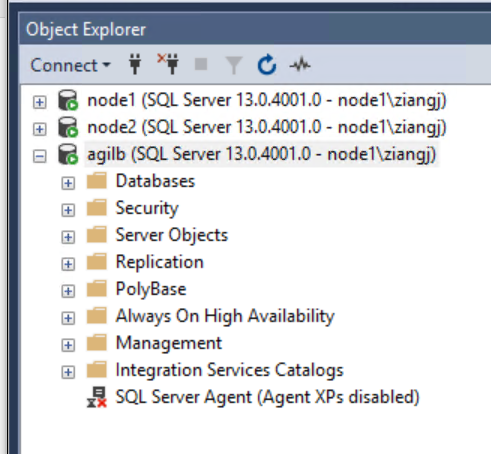
在 SQL Server 上启用 AG 功能。
配置 AlwaysOn 可用性组,由于节点没有加入 AD 域,所以不能用域认证,只能用证书认证,因此需要创建证书和端点,在配置可用性组之前,各节点进行证书认证,各节点数据库创建的证书都备份并在其他节点还原:
节点 A:创建主密钥/证书/端点,备份证书。使用 SSMS 连接节点 A,执行以下语句:
USE master
GO

-- Create a database master key
CREATE MASTER KEY ENCRYPTION BY PASSWORD = '1qaz@wsx3edc$rfv'
GO

-- Create a new certificate
CREATE CERTIFICATE SQLBAG_Certificate_Node1_Private
WITH SUBJECT = 'SQLBAG_Certificate_Private - Node 1',
START_DATE = '20170801'
GO

-- Backup the public key of the certificate to the filesystem
BACKUP CERTIFICATE SQLBAG_Certificate_Node1_Private
TO FILE = 'c:\temp\SQLBAG_Certificate_Node1_Public.cert'
GO

-- Create an endpoint for the Availability Group
CREATE ENDPOINT SQLBAG_Endpoint
STATE = STARTED
AS TCP
(
    LISTENER_PORT = 5022
)
FOR DATABASE_MIRRORING
(
    AUTHENTICATION = CERTIFICATE SQLBAG_Certificate_Node1_Private,
    ROLE = ALL,
    ENCRYPTION = REQUIRED ALGORITHM AES
)
GO
节点 B:创建主密钥/证书,备份证书。使用 SSMS 连接节点 B,执行以下语句:
USE master
GO

-- Create a database master key
CREATE MASTER KEY ENCRYPTION BY PASSWORD = '1qaz@wsx3edc$rfv'
GO

-- Create a new certificate
CREATE CERTIFICATE SQLBAG_Certificate_Node2_Private
WITH SUBJECT = 'SQLBAG_Certificate_Private - Node 2',
START_DATE = '20170801'
GO

-- Backup the public key of the certificate to the filesystem
BACKUP CERTIFICATE SQLBAG_Certificate_Node2_Private
TO FILE = 'c:\temp\SQLBAG_Certificate_Node2_Public.cert'
GO

-- Create an endpoint for the Availability Group
CREATE ENDPOINT SQLBAG_Endpoint
STATE = STARTED
AS TCP
(
    LISTENER_PORT = 5022
)
FOR DATABASE_MIRRORING
(
    AUTHENTICATION = CERTIFICATE SQLBAG_Certificate_Node2_Private,
    ROLE = ALL,
    ENCRYPTION = REQUIRED ALGORITHM AES
)
GO
将节点 B 上生成的 cer 文件拷贝到节点 A 上,然后在节点 A 上执行以下语句:
CREATE LOGIN Node2Login WITH PASSWORD = '1qaz@wsx3edc$rfv'
GO

-- Create user for the login
CREATE USER Node2User FOR LOGIN Node2Login
GO

-- Import the public key portion of the certificate from the other node
CREATE CERTIFICATE SQLBAG_Certificate_Node2_Public
AUTHORIZATION Node2User
FROM FILE = 'c:\temp\SQLBAG_Certificate_Node2_Public.cert'
GO

-- Grant the CONNECT permission to the login
GRANT CONNECT ON ENDPOINT::SQLBAG_Endpoint TO Node2Login
GO
将节点 A 上生成的 cer 文件拷贝到节点 B 上,然后在节点 B 上执行以下语句:
CREATE LOGIN Node1Login WITH PASSWORD = '1qaz@wsx3edc$rfv'
GO

-- Create user for the login
CREATE USER Node1User FOR LOGIN Node1Login
GO

-- Import the public key portion of the certificate from the other node
CREATE CERTIFICATE SQLBAG_Certificate_Node1_Public
AUTHORIZATION Node1User
FROM FILE = 'c:\temp\SQLBAG_Certificate_Node1_Public.cert'
GO

-- Grant the CONNECT permission to the login
GRANT CONNECT ON ENDPOINT::SQLBAG_Endpoint TO Node1Login
GO
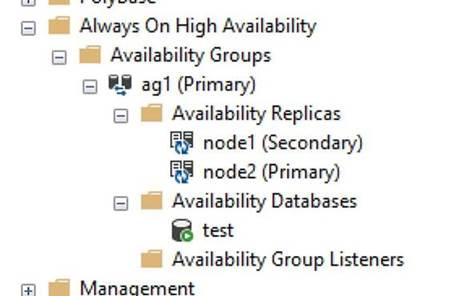
创建 AG:
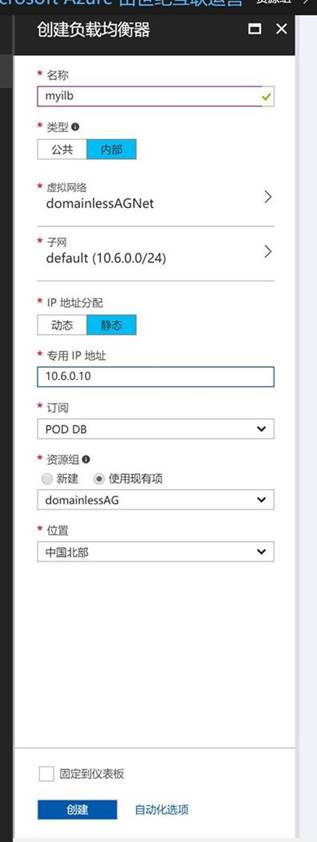
配置负载均衡器:
在该资源组下面创建 ILB:
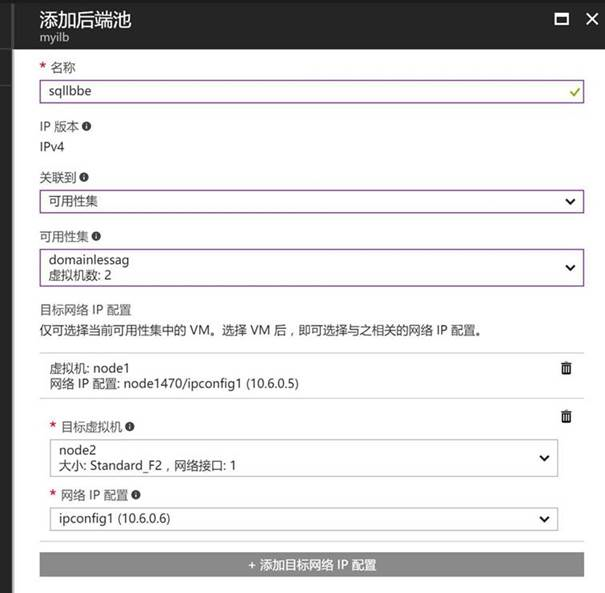
配置后端池:
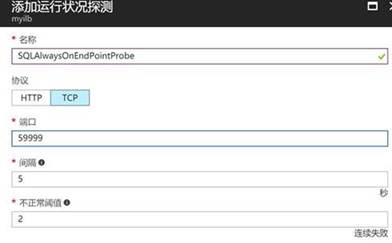
配置检测:
配置规则:
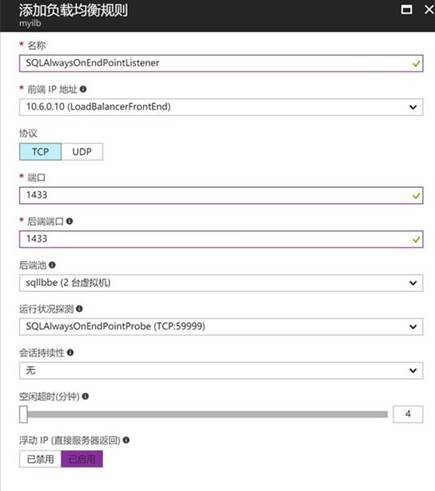
配置 Listener:
在 DNS 中为 AG Listener 加入需要的 AName:

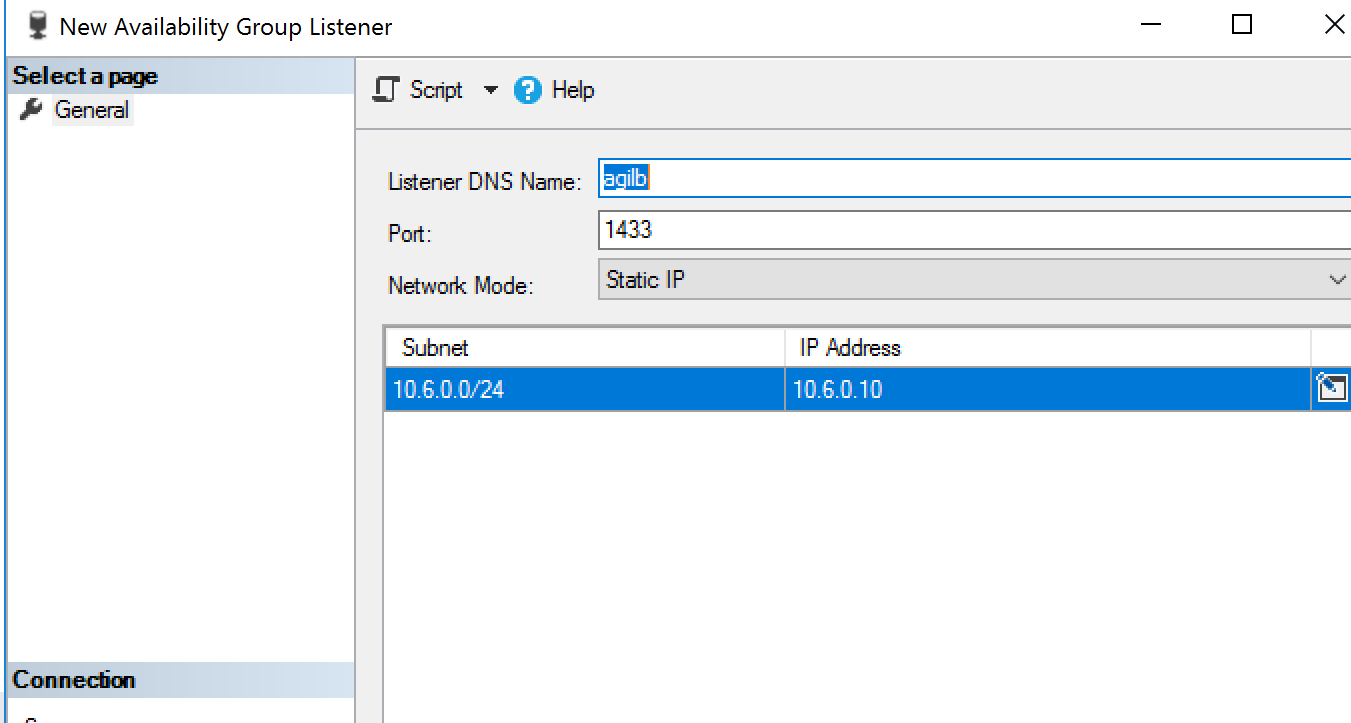
使用 SSMS 创建 Listener:
在两个节点上分别运行的语句:
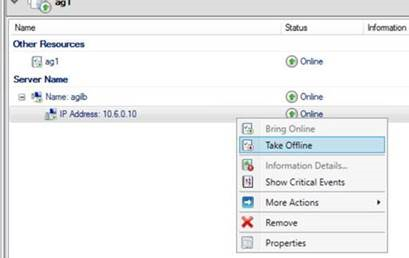
$ClusterNetworkName = "Cluster Network 1" # the cluster network name (Use Get-ClusterNetwork on Windows Server 2012 of higher to find the name)
$IPResourceName = "ag1_10.6.0.10" # the IP Address resource name
$ILBIP = "10.6.0.10" # the IP Address of the Internal Load Balancer (ILB). This is the static IP address for the load balancer you configured in the Azure Portal.
[int]$ProbePort = 59999

Import-Module FailoverClusters

Get-ClusterResource $IPResourceName | Set-ClusterParameter -Multiple @{"Address"="$ILBIP";"ProbePort"=$ProbePort;"SubnetMask"="255.255.255.255";"Network"="$ClusterNetworkName";"EnableDhcp"=0}
在 Failover Cluster Manager 中将 AG Listener 资源下线再上线:
使用 SSMS 进行验证: