如何使用 VSTS 发布 Web 应用
本文展示了如何构建 VSTS 与中国 Azure 账户之间的连接。开发人员在 Github 上集成后,编译并测试通过,再发布到 Azure Web 应用上,期望的是持续集成持续发布,也就是 CICD。我们可以通过 Visual Studio Online(简称 VSO),与 Azure 服务的集成,使用非常方便。
具体步骤如下:
登陆 VSO 并创建 VSTS 项目。
构建 VSTS 与中国 Azure 账户之间的连接。
首先调用 Powershell 脚本来注册当前 VSTS 服务到 AzureAD 里面,并授予它相应 Azure 资源的 Contributor 权限,比如资源组或者整个订阅,当然也可以是某个资源。
安装 Azure PowerShell, 并将以下 PowerShell 脚本保存为:RegisterVstsMooncake.ps1。
param
(
    [Parameter(Mandatory=$true, HelpMessage="Enter Azure Subscription name. You need to be Subscription Admin to execute the script")]
    [string] $subscriptionName,
    [Parameter(Mandatory=$true, HelpMessage="Provide a password for SPN application that you would create")]
    [string] $password,
    [Parameter(Mandatory=$false, HelpMessage="Provide a SPN role assignment")]
    [string] $spnRole = "contributor",
    [Parameter(Mandatory=$false, HelpMessage="If assign role for target resource group, provide its name")]
    [string] $resourceGroupName
)
#Initialize
$ErrorActionPreference = "Stop"
$VerbosePreference = "SilentlyContinue"
$userName = $env:USERNAME
$newguid = [guid]::NewGuid()
$displayName = [String]::Format("VSO.{0}.{1}", $userName, $newguid)
$homePage = "http://" + $displayName
$identifierUri = $homePage
#Initialize subscription
$isAzureModulePresent = Get-Module -Name AzureRM* -ListAvailable
if ([String]::IsNullOrEmpty($isAzureModulePresent) -eq $true)
{
Write-Output "Script requires AzureRM modules to be present. Obtain AzureRM from https://github.com/Azure/azure-powershell/releases. Please refer https://github.com/Microsoft/vsts-tasks/blob/master/Tasks/DeployAzureResourceGroup/README.md for recommended AzureRM versions." -Verbose
    return
}
Import-Module -Name AzureRM.Profile
Write-Output "Provide your credentials to access Azure subscription $subscriptionName" -Verbose
Login-AzureRmAccount -SubscriptionName $subscriptionName -Environment 'AzureChinaCloud'
$azureSubscription = Get-AzureRmSubscription -SubscriptionName $subscriptionName
$connectionName = $azureSubscription.Name
$tenantId = $azureSubscription.TenantId
$id = $azureSubscription.Id
$securePASS = ConvertTo-SecureString -String $password -AsPlainText -Force
#Create a new AD Application
Write-Output "Creating a new Application in AAD (App URI - $identifierUri)" -Verbose
$azureAdApplication = New-AzureRmADApplication -DisplayName $displayName -HomePage $homePage -IdentifierUris $identifierUri -Password $securePASS -Verbose
$appId = $azureAdApplication.ApplicationId
Write-Output "Azure AAD Application creation completed successfully (Application Id: $appId)" -Verbose
#Create new SPN
Write-Output "Creating a new SPN" -Verbose
$spn = New-AzureRmADServicePrincipal -ApplicationId $appId
$spnName = $spn.ServicePrincipalNames[0]
Write-Output "SPN creation completed successfully (SPN Name: $spnName)" -Verbose
#Assign role to SPN
Write-Output "Waiting for SPN creation to reflect in Directory before Role assignment"
Start-Sleep 20
if ([String]::IsNullOrEmpty($resourceGroupName) -eq $true)
{
    Write-Output "Assigning role ($spnRole) to SPN App ($appId)" -Verbose
    New-AzureRmRoleAssignment -RoleDefinitionName $spnRole -ServicePrincipalName $appId
}
else
{
    Write-Output "Assigning role ($spnRole) to SPN App ($appId) for resource group ($resourceGroupName)" -Verbose
New-AzureRmRoleAssignment -ResourceGroupName $resourceGroupName -RoleDefinitionName $spnRole -ServicePrincipalName $appId
}
Write-Output "SPN role assignment completed successfully" -Verbose
#Print the values
Write-Output "`nCopy and Paste below values for Service Connection" -Verbose
Write-Output "***************************************************************************"
Write-Output "Connection Name: $connectionName(SPN)"
Write-Output "Subscription Id: $id"
Write-Output "Subscription Name: $connectionName"
Write-Output "Service Principal Id: $appId"
Write-Output "Service Principal key: <Password that you typed in>"
Write-Output "Tenant Id: $tenantId"
Write-Output "***************************************************************************"
执行以下命令:
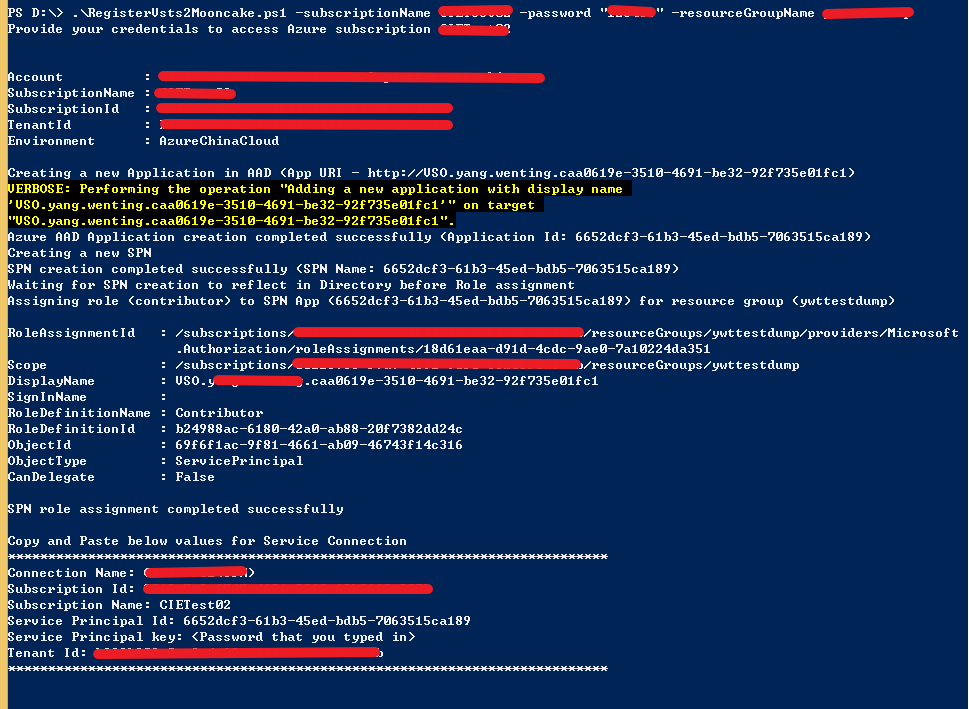
.\RegisterVsts2Mooncake.ps1 -subscriptionName '[YourAzureChinaSubscriptionName]' -password '[YourPassword]' -resourceGroupName '[YourAzureChinaResourceGroup]'注意
第一个参数 subscriptionName 是订阅名称,password 是密码。注意这个密码不一定是 AzureChina 登录的密码,我们可以设置为其他的密码。请牢记这个密码,我们会在后续步骤中使用, resourceGroupName 是资源组名称。
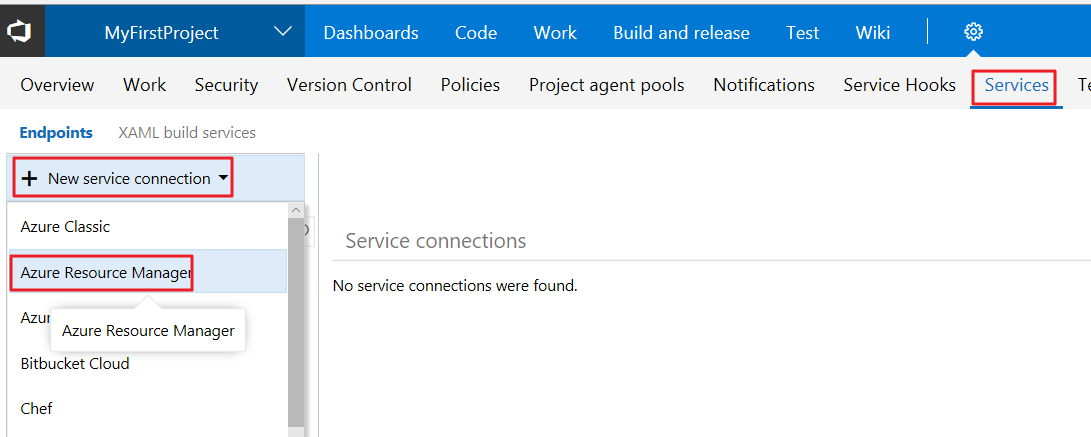
登录 VSTS,在创建的项目的主页上,点击 设置 -> Services -> New Service Endpoint -> Azure Resource Manager。
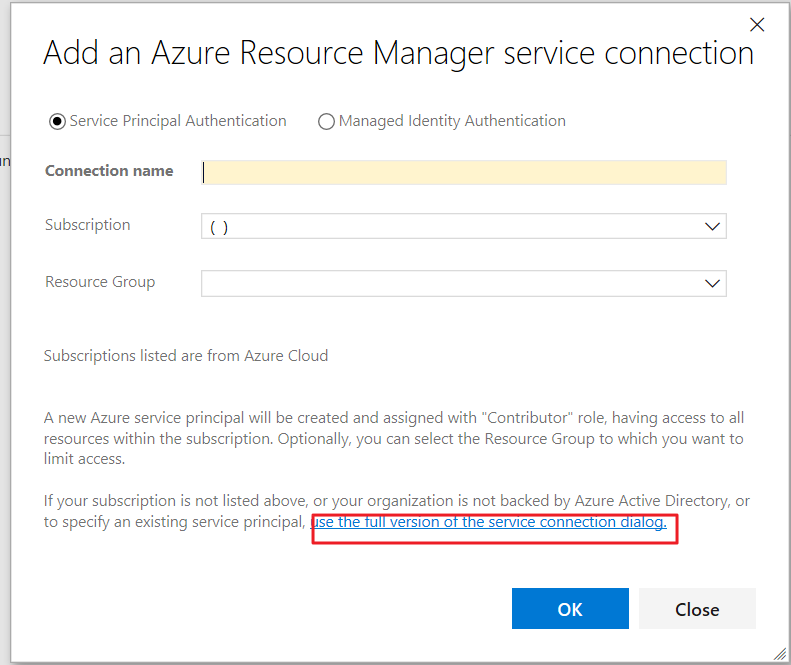
在弹出的对话框里,点击文字链接 “use the full version of the endpoint dialog.”,会出现如下对话框,输入前面脚本的输出值,然后可以点击 “Verify connection” 验证连接。

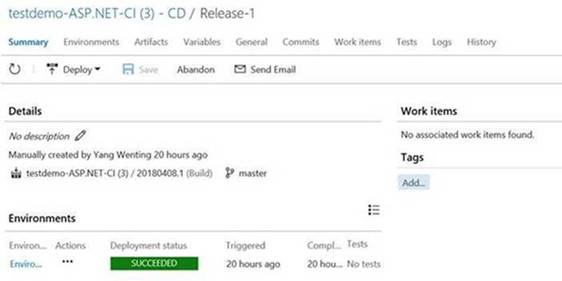
此时创建好连接之后,便可以进行持续发布了。
发布 Azure Web 应用。
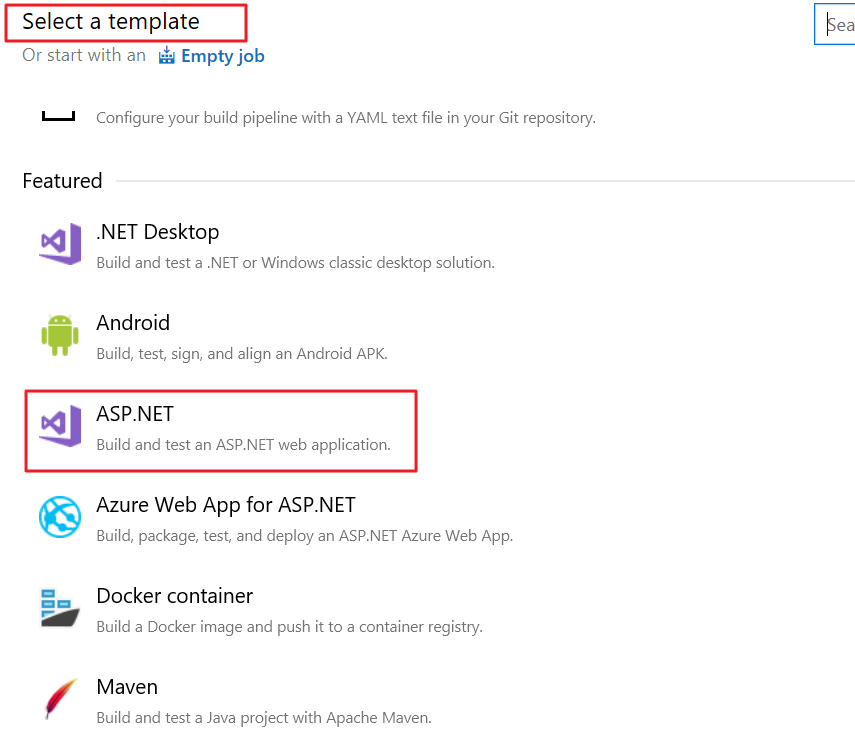
在 build and release 标签页下的 Builds 选项中选择 template 为 ASP.net (如果项目为 .netcore 选择 Asp.net core)。
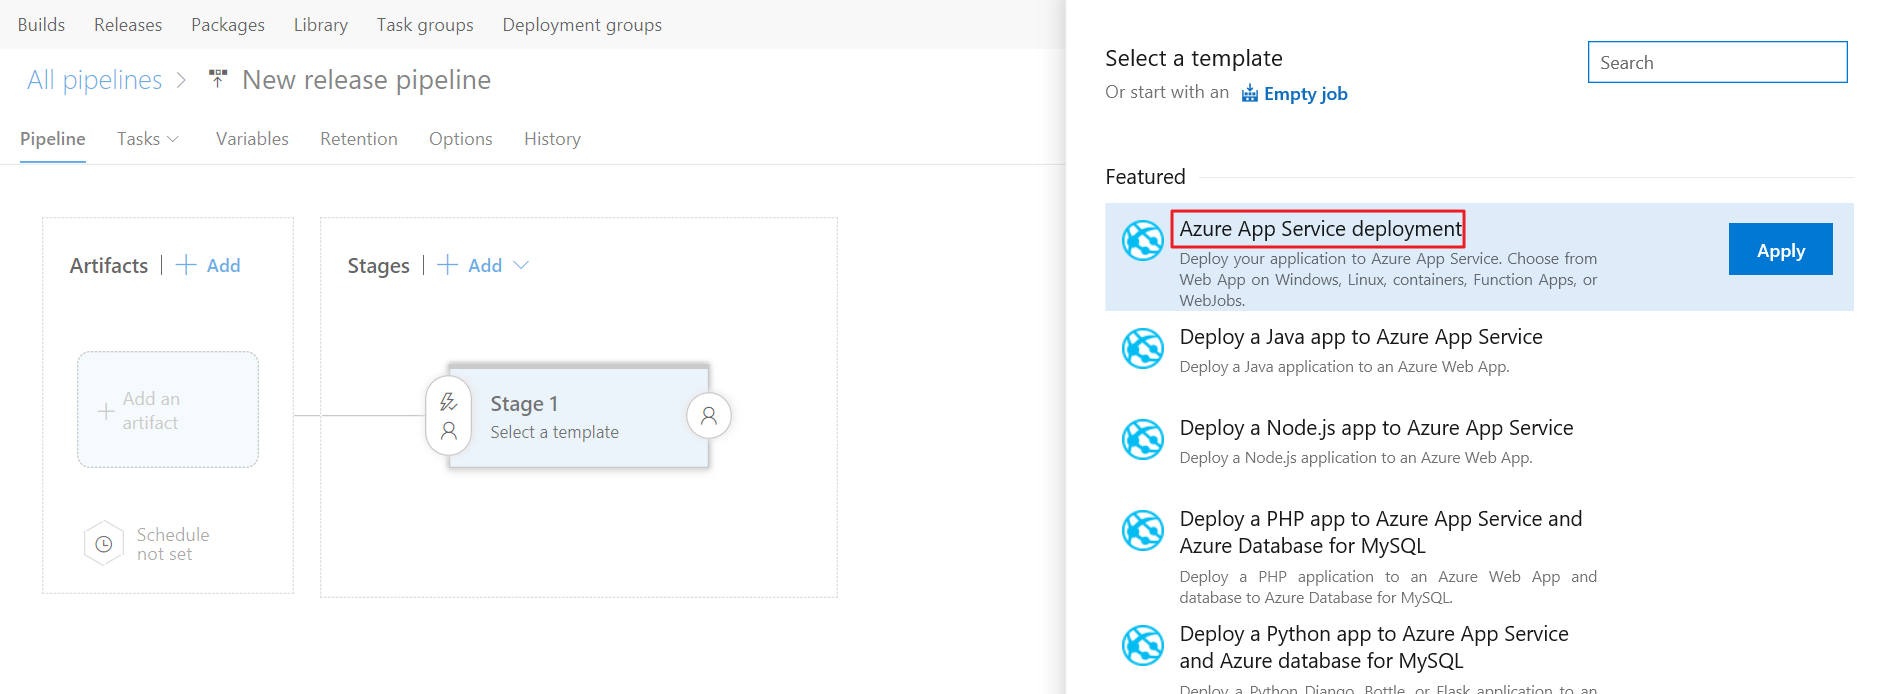
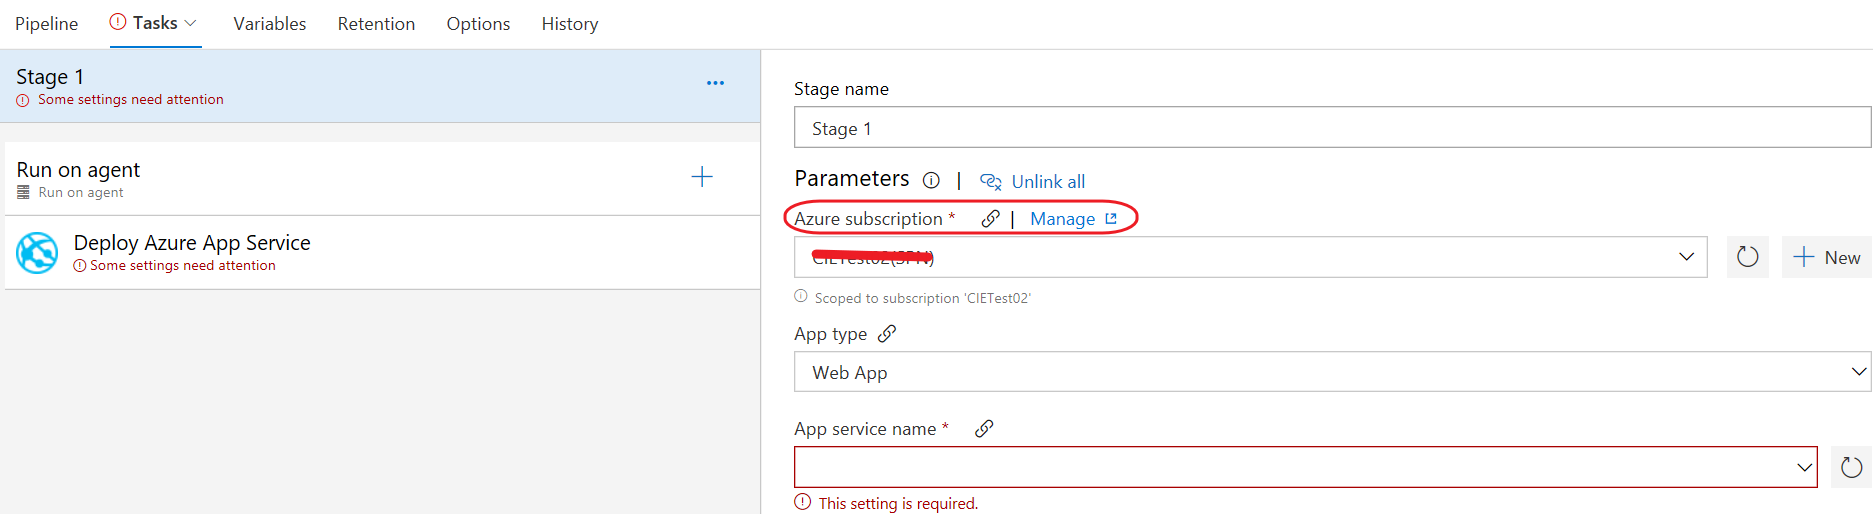
在 Releases 选项中选择 Azure App Service Deployment 即可成功发布。
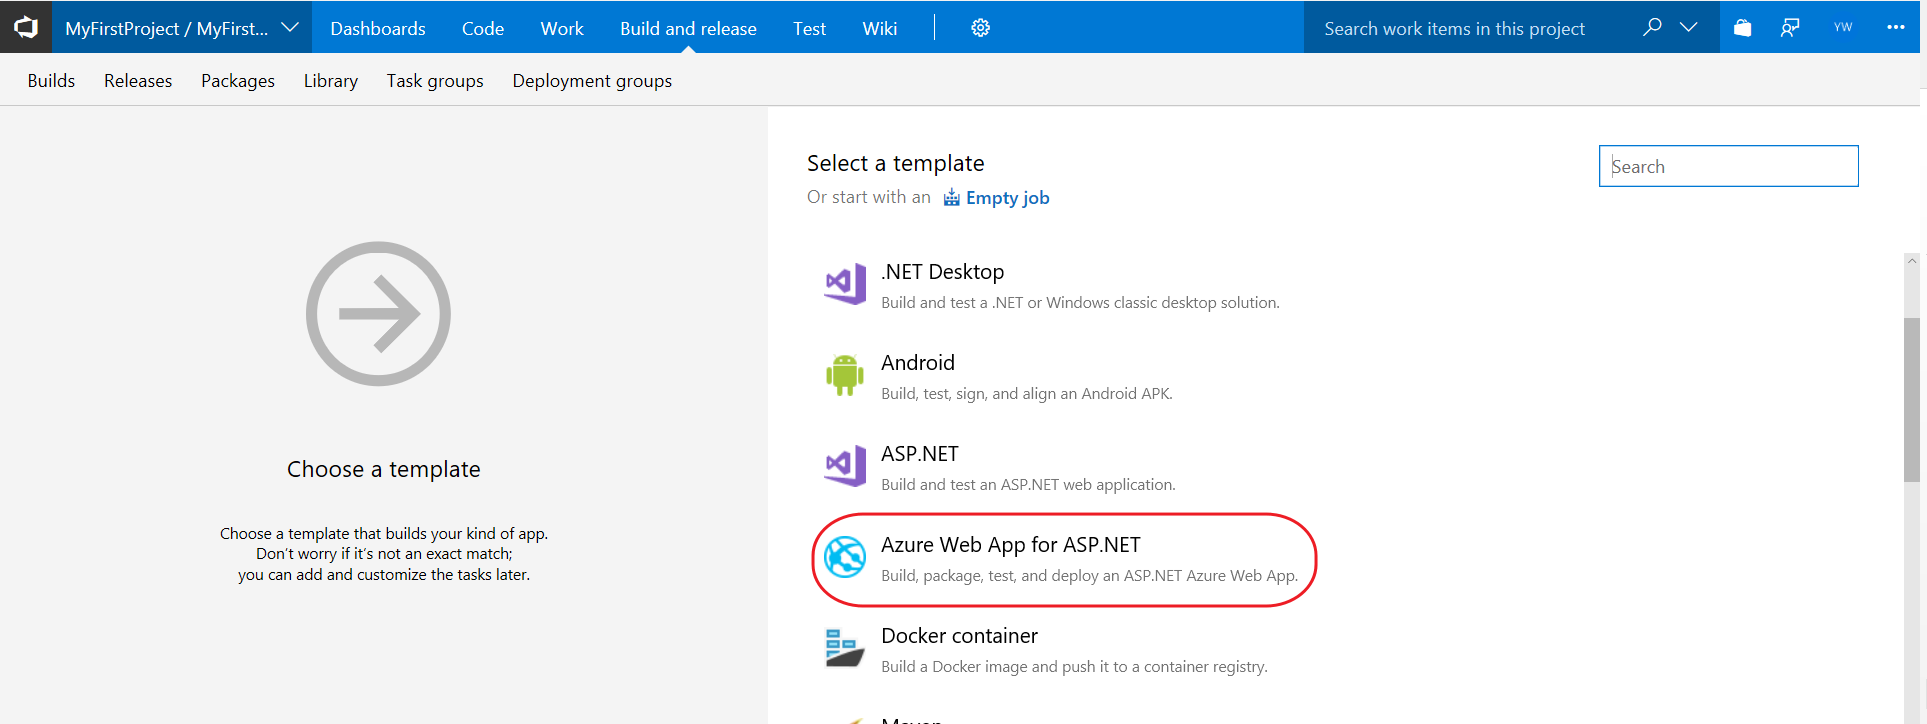
或者在 build 选项中选择 template 为 Azure Web App for ASP.NET,直接进行发布。